Table of Contents
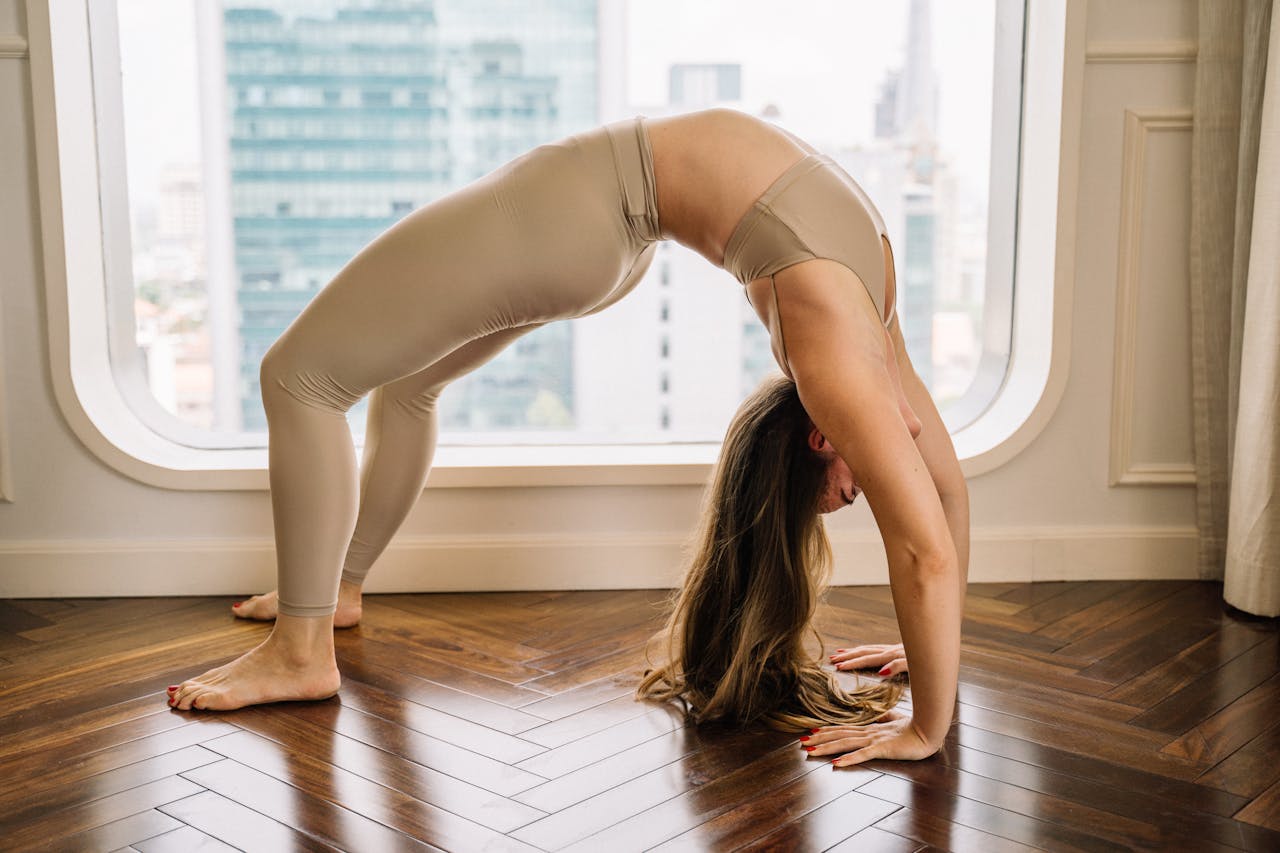
Discover the invigorating yoga pose of Chakranasana, also known as the Wheel Pose or Urdhva Dhanurasana. Energize your chakras, increase flexibility, strength, and balance.
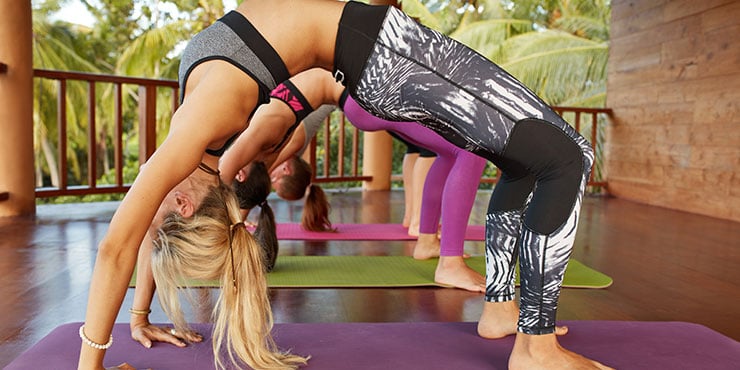
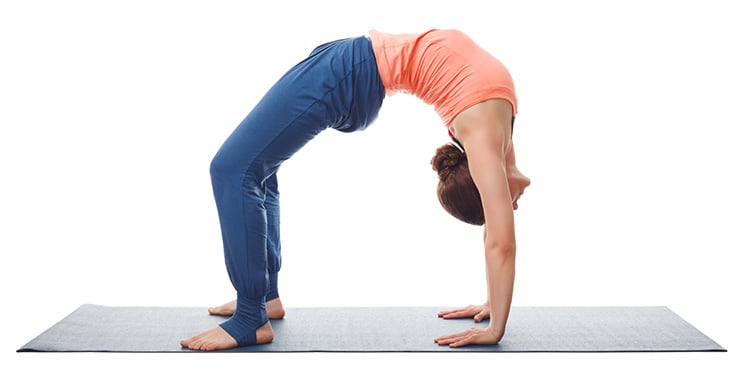
Chakrasana is a back-bending yoga pose done on all fours with the belly facing up. Also known as chakrasana wheel pose or Upward Facing Bow Pose, in the ashtanga yoga practice it is performed just prior to the finishing sequence of yoga asanas. This article will discuss the various poses step by step, as well as the benefits of chakrasana in every day life. Remember to have a yoga mat ready before you practice yoga.
Ancient Sanskrit Meanings Behind the Chakrasana Pose
In Asana yoga, Chakrasana is known as 'Wheel Pose', and is based on the Sanskrit word 'Chakra', which translates to wheel. Urdhva Dhanurasana derives its name from two Sanskrit words: 'Urdhva' meaning upwards, and 'Dhanura' translating to bow, as used for shooting arrows. This yoga pose also strengthens arms and legs, besides helping with flexibility.
Mastering the Challenges
 Wheel Pose is a challenging yoga posture that stretches the front of the shoulders and hips while bearing the body's weight. To perform this yoga pose, one must actively lift into the stretch instead of simply relaxing.
One challenge of Chakrasana is that the muscles at the back of the joints become shortened, making it harder to use them effectively. Additionally, both hands and feet are on the floor simultaneously, which can be more challenging compared to yoga poses like Chaturanga Dandasana, Downward Facing Dog, and Upward Facing Dog, where the hips and shoulders are not stretched as deeply.
An effective approach to mastering Chakrasana is to first focus on setting up one part of the body and then move on to the other.
Benefits of Chakrasana Yoga
Chakrasana yoga can be challenging, but the benefits of chakrasana are numerous. Chakrasana is an experience of breaking things down and feeling energized afterward. The body is stretched and strengthened in the
arms, legs, and back. Other benefits of chakrasana include helping the vestibular system open up the heart chakra, positively affecting physical and mental health while countering the effects of too much sitting. Warming up with a yoga pose, such as Ustrasana, Adho Mukha Svanasana and Bridge Pose is recommended.
Chakranasana is also a beneficial pose for chakra healing, being a heart-opening posture, it is highly beneficial for the Heart Chakra.
Warming Up for Chakrasana
Get your knee extensors, vastus muscles, and hip flexors (sartorius, rectus femoris, and tensor fascia latae) ready for Chakrasana with Ustrasana (Camel Pose). Start in a kneeling position with your hands on your heels or the floor beside you. Press your feet down and hips forward and up. You can also start your yoga posture with your hips lifted, reaching back to your heels (or using yoga blocks) and pressing the tops of your feet down into the floor as you move your hips forward. Experiment with toes tucked or pointed back.
Adho Mukha Svanasana (Downward Facing Dog) warms up the shoulders, so they are ready for weight-bearing, particularly if you focus on using your shoulders to press your ribcage away from your hands. If needed, make it easier with knees bent.
Lastly, Bridge Pose gets the entire body prepared for Chakrasana.
Activate Extensors and Flexors for Chakrasana Pose
The knee extensor muscles are the vastus muscles that straighten your knees. Working towards Chakrasana, you can use these muscles to unbend your knees or reduce their bend while pushing your hips back towards your head. If your knees already rest over your heels, activate these muscles to keep them in place and unbend them simultaneously.
In addition, the hip flexors below the knee—rectus femoris, sartorius, gracilis—and tensor fascia latae attach to pull forwards and upwards on each hip bone. Thus, they lift up the thigh bones (femurs).
The Movement of Hips, Knees, and its Impact on Wrists
When lifting hips from the ground, it is important to understand the path of the knees and hips and how it affects the bend of the wrist joints.
Knees Stationary
If the position of the knees remains fixed, meaning they do not move forward or backward, the hips must move backward as they are lifted to knee height. Assuming the knee's position remains fixed relative to the heels, once passed knee height, the hips start moving forward.
To maintain ideal alignment, the goal is to keep the knees over the heels, resulting in vertical shins. Once the hips reach knee height, keeping the knees stationary causes the hips to move forward and up. However, it is possible to keep moving the knees back, causing the hips to move straight up. Another option is to move the hips up and back.
Hips Stationary
Next, let's consider what happens when lifting the hips straight up without allowing them to shift forward or backward. In this case, as the hips move higher, the knees will move forward when below the height of the knees. Once the knees surpass the height of the hips, they start moving back.
Wrist Bend
One challenge when lifting into wheel pose is that if the hips move straight up or upward and forward, it increases the bend of the wrists, assuming the hand position does not change. To counteract this, allow the hips to move back as they move higher.
Straightening the Elbows
Another factor that affects wrist bend is how straight the elbows are. Usually, as the hips lift higher, the bend in the elbows decreases. Therefore, with a high degree of elbow bend, the wrists can be comfortable while lifting into Chakrasana. As the hips reach higher, the elbows become straighter, potentially causing an increase in wrist bend if focusing on moving the hips up or forward and up.
Different approaches can be used at different stages of moving into the wheel pose to overcome this. First, focus on getting the knees over the heels and keeping them there as you lift higher. As the elbows become straighter, work on pushing the knees and hips back to keep the wrists comfortable as the hips move higher.
Initial Set Up
Lifting the hips during the initial stages of a workout should involve considering the effect of having the shoulders on the floor. It is important to draw a line from the shoulders to the knees and observe how, when the hips are below this line, the knees tend to move forwards as they lift higher. Conversely, when above this line but below knee height, as the hips move higher, they tend to move back.
One approach to maximize effectiveness in this stage is to work at getting your shoulders closer to your feet. Begin by positioning your hips at or above the line from your shoulders to your knees before incrementally lifting them higher while shuffling your shoulders further forwards. Aim for a position near enough that you can easily touch both feet with your hands. However, it is essential to keep hip and shoulder width equal throughout.
How to Practice Chakrasana Step-by-Step
 The practice of chakrasana can be broken down into a few distinct steps. Forward is in the direction of the feet while backward is in the direction of the head.
To begin, bend the knees and place both feet flat on the floor. Lift your hips as previously described and work on getting them higher. Use your front thigh muscles to look as if straightening your knees, thus engaging your knee extensors. Simultaneously, push your knees and hips back by activating your flexors using a pull from your ASICs towards your knees.
The next stage involves lifting your head off the floor and placing its crown there instead. Put either palm flat on either side of or just behind it prior to raising it. Position the hands so forearms are vertical with fingers pointing towards feet before levering up with combined arm and leg strength while actively pushing the head into the floor when repositioning hands for added safety. Continue pushing knees and hips back while also resisting backward movement generated by leg and hip muscles using shoulders and arms.
If possible, use a combination of arm and leg strength to lift the head off the ground afterward. Open chest to make it easier for shoulders to do their job here then concentrate most energy on using legs to push pelvis backward and up concurrently resisted by shoulders/arms at the same time. Finally, aim to straighten elbows - reduce wrist bend by allowing hips to move rearward whilst applying noticeable resistance with arms throughout the process until the goal is reached. To further support wrists during this step, dig fingertips into the floor as the torso lifts higher accordingly.
The Long Road to Chakrasana Wheel Pose
Reaching full wheel pose may require several weeks or months of practice and includes many steps. To make this journey easier, it is recommended to practice three to five times a week, each session consisting of three to five attempts with rests in between and lasting up to five slow breaths each time, starting once you start engaging your arms.
Getting Your Back and Head Off the Floor
When first starting out with chakrasana, one of the main challenges is building shoulder strength to lift your back and head off the ground. To aid in this process, practice pressing your palms into the floor while lying on your back. Instead of attempting to straighten yourself up, concentrate on keeping your body still while pressing your hands into the floor with full strength.
For this exercise, position palms beside ears with fingers pointing towards feet. Start by moving shoulders towards ears then press hands down forcefully whilst holding body from lifting. Practice three to five pushes gradually pressing down and relaxing before resting and repeating for a total of three sets. As you progress, aim to press hands so arm and shoulder muscles activate whilst slowly allowing the body to lift at the same time - maintaining feelings of activation in arms throughout full movement.
Modifying Chakrasana Wheel Pose
One way to modify this pose in yoga is by elevating your feet. Place them on a chair then use your legs to lift your hips, and shuffle your upper body closer to the chair until in a suitable position. Next, press palms into the floor to lift up onto head then use arms to raise head and upper body fully.
The advantage of this approach is that it puts less strain on the shoulders as arms don’t have to bend back as far as the shoulders. And, if feet are placed high enough, it may even be possible to straighten elbows. Alternatively, if wrists and shoulders are tight, set up a pair of yoga blocks angled against a wall at the base for hands - careful with placement and pressure, so blocks don’t slip. This should assist in creating a less severe angle at the wrists.
Counterposing Wheel Pose
To counter Chakrasana, try Paschimottanasana, or Seated Forward Bend, or Uttanasana for a Standing Forward Bend. To make it more refreshing, lie on your back with arms and legs reaching up and lift the upper back and pelvis off the floor in what is known as Dead Dog Reach. This pose uses the muscles at the front of the spine to stretch the back body while bending the spine forwards.
Alternatively, Rack Pose stretches shoulders with arms behind the body. Reaching arms back and up while sitting upright is an active option that strengthens shoulder muscles simultaneously.
Contraindications for Wheel Pose
Avoid the Wheel Pose if you have a neck injury or neck problems since it can bear body weight when adjusting hand position. Also, pass on the pose if you have wrist, elbow, shoulder, or back injuries. Low/high blood pressure sufferers, those with a heart condition, and vertigo should also look for an alternative. Eye conditions may be adversely affected by this pose, so consult an ophthalmologist to be sure. Pregnant women may risk abdominal separation from this and other spinal backbends, and so might choose to avoid Wheel Pose if they lack experience.
References
Understanding and Preventing Yoga Injuries
Disclaimer
The contents of this article are provided for informational purposes only and are not intended to substitute for professional medical advice, diagnosis, or treatment. It is always recommended to consult with a qualified healthcare provider before making any health-related changes or if you have any questions or concerns about your health. Anahana is not liable for any errors, omissions, or consequences that may occur from using the information provided.

By: Anahana
The Anahana team of researchers, writers, topic experts, and computer scientists come together worldwide to create educational and practical wellbeing articles, courses, and technology. Experienced professionals in mental and physical health, meditation, yoga, pilates, and many other fields collaborate to make complex topics easy to understand. Anahana is also home to specialists in crystals, tarot, angel numbers, astrology, life path numbers, zodiac signs, and horoscopes. By combining evidence-based wellness with spiritual and energetic practices, the team offers clear, trustworthy guidance for both mind-body health and modern spirituality.