Table of Contents
Yoga can be helpful for some types of knee pain. However, prior to trying to use yoga to deal with your knee pain, it can help to understand how the knees work.
It helps to understand the types of knee pain that yoga may help to alleviate. What follows is a general introduction to yoga and knee pain. It should not be substituted for medical advice
When Yoga Can Help with Knee Pain
As a rule of thumb, yoga may be able to help with knee pain if the initial problem is due to ligament damage or meniscus damage, assuming that the initial tissue damage has had time to heal. It can also help if the cause of knee pain is poor muscle function.
Your brain may have reprogrammed the way your knee muscles work after an injury to trigger pain or tightness to prevent further joint damage. This in turn may have caused you to walk or stand in ways that favor the affected joint leading to further imbalance.
Lingering knee pain after these tissues have had time to heal may indicate that those same programs are still active and are now causing pain due to overuse of particular muscles and now healed muscles not functioning properly as you work at regaining lost mobility.
A large part of yoga is about re-programming how your leg muscles work together so that they work well together through a whole range of possible positions, and with it relieve knee pain.
A Basic Approach to Dealing with Knee Pain
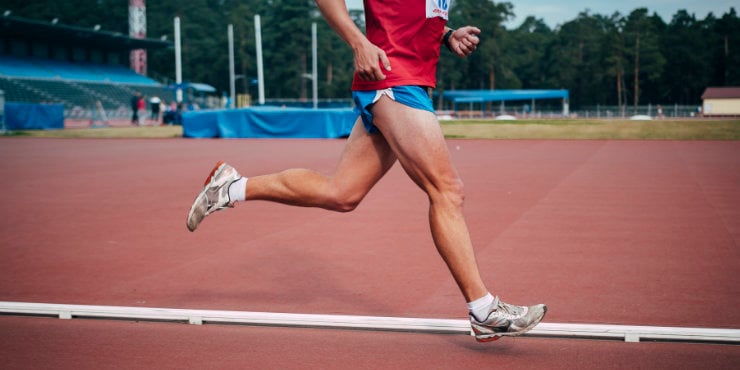 A key understanding required for dealing with knee pain is that the knee is designed to rotate. You could think of knee rotation as rotation of the shin relative to the femur. (But it can be equally important to think of shin rotation relative to the hip bone.)
The amount of rotation is small but it is important and it is controllable. There are muscles that drive this rotation and that help to stabilize the knee in both rotated and unrotated positions.
The shin also rotates relative to the foot and ankle. This isn’t a pure rotation. It accompanies changes in foot posture. For example:
-
When you rotate your shins inwards (while standing with knees slightly bent), you should find that your inner arch collapses or flattens.
-
When you rotate your shins outwards, you should find that your inner arch lifts.
Rotation of the shin relative to the knee and relative to the foot allows the foot to adapt to variations in terrain and variations in standing position. For example, it allows us to squat with our feet in different positions and at different distances apart. And it allows us to move our knees outwards or inwards while squatting.
The hip joint also rotates, and just as importantly, there are muscles that work between the hip bone and the lower leg to help control shin rotation. And so you could think of the shin as being able to rotate relative to the foot, relative to the knee and relative to the hip bone!
With knee, ankle and hip all having the ability to rotate to some degree, a large part of dealing with knee pain is controlling rotation at all three joints.
-
This could mean working from the ground up and stabilizing the feet, ankles and shin bones against rotation and then from there stabilizing the thigh bone and hip bone.
-
It could mean working from the hips down. That can mean stabilizing the SI joints as well as the hip joint against rotation and from there stabilizing the thigh bone and lower leg bones against rotation.
-
It could mean focusing on the weak link where you lack rotational stability and control whether that is at the foot and ankle, at the knee or at the hip (and even the SI joints).
One starting point for all of this is the hip suspension system.
Hip Stability and the Hip Suspension System
The hip suspension system is like the suspension system of a car that prevents the chassis from bottoming out on the wheels. The hip joint suspension system prevents the top of the hip socket from bottoming out on the ball of the femur.
Note that activating the hip suspension muscles may give you hip bone rotational stability for free. It may also activate muscles that help to stabilize the knee joint for rotation. But it’s not a guarantee and in some instances you may have to further stabilize your hip bones depending on what you are doing.
Lengthening your Spine for Hip Bone Stability
Another method for stabilizing the hip bones is to lengthen your spine. If you pull your ear holes back so that your head moves back relative to your ribcage, this lengthens the back of your neck and at the same time lifts your chest. This can help to anchor and lengthen your abs which then pull upwards on the fronts of your hip bones.
If you can’t pull your head back and up, or choose not to, another option is to lift your chest and from there use your abs to pull up on the fronts of your hip bones.
If you choose to improve your spinal awareness and control, you can learn to lengthen your entire spine and keep it lengthened whether bending it or twisting it or simply using it.
Activating the Transverse Abdominis for Hip Bone Stabilization
Another option for stabilizing your hip bones is to pull your belly in, past the border of your hip bones and rib cage.
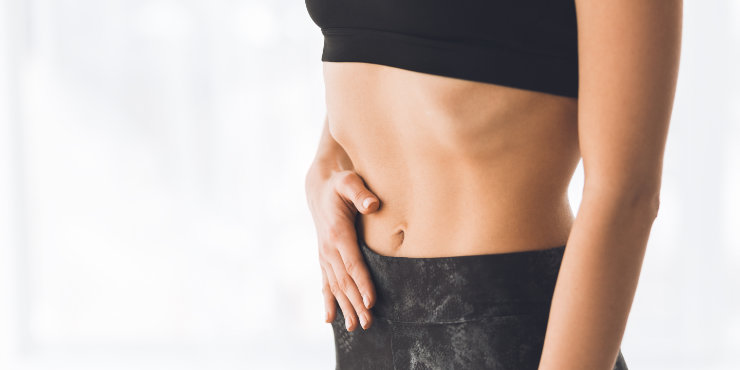
This isn’t a sucking-in action as much as a pulling-in action.
This uses your transverse abdominis to pull inwards on your obliques and rectus abdominis which adds tension to those muscles so that they exert an upward pull on the front of your hip bones.
This can then help to anchor the thigh muscles that attach there.
Vastus Medialis Obliquus
Building on the idea of stability, particularly rotational stability, one muscle that is often cited in relation to knee pain is the vastus medialis obliquus.
The vastus medialis is the teardrop shaped inner quad muscle just above and to the inside of the knee. The vastus medialis obliquus is the lowest part of this tear-drop shaped muscle.
This part of the muscle attaches to the tendon of the adductor magnus long head. For it to function effectively, the adductor magnus long head tendon has to have tension. With the adductor magnus long head tendon sufficiently tensioned, the vastus medialis obliquus has an anchored end point so that it can then work effectively across the knee joint.
The adductor magnus long head is an important muscle for controlling, and stabilizing, hip rotation. It runs down the back of the thigh and attaches to the inside of the femur just above the knee joint. While it doesn’t cross the knee joint, it can have an affect on the knee joint when active because it anchors the vastus medialis obliquus.
With the adductor magnus long head activated, the vastus medialis obliquus can activate along with other knee muscles to help stabilize the knee against rotation. Other muscles it may work in conjunction with include the biceps femoris short head muscle and the popliteus.
Vastus Lateralis Obliquus
Another muscle that relates to stability of the kneecap is the vastus lateralis obliquus. This muscle tends to be easier to distinguish than the vastus medialis obliquus. It forms the lower part of the vastus lateralis and has attachments to the lateral intermuscular septum as well as the iliotibial band.
Because of it’s attachment to the IT band, it makes sense that it requires a tensioned IT band in order to activate effectively. What this also means is that tension in the IT band can affect the femur as well as the tibia.
Muscles That Control Knee Rotation Relative to the Hip
One group of muscles that can help control knee rotation are the hip flexors, in particular, the tensor fascia latae (which attaches to the IT band), the sartorius, and the gracilis (which can help in flexing the hip if the hip is extended.)
These muscles attach to the inside or outside edges of the top of the tibia.
Another group of muscles that help control knee rotation include particular hamstring muscles (semitendinosus and the biceps femoris long head) plus the superficial gluteus maximus.
These muscles attach to the fibula, as well as to the outside and inside edges of the top of the tibia.
Note that the muscles that run from the hip bone to the outer or inner edge of the lower leg bones all attach to the prominent corner points of the hip bone.
As well as helping to control shin rotation relative to the hip bone, these muscles can also help control hip flexion and extension as well as hip abduction and hip adduction.
While not necessarily true in all cases, a general correspondence is that the hip flexors run down the front of the thigh, the hip extensors down the back, the adductors down the inside of the thighs and the abductors along the outside.
And so some simple techniques for helping to control knee rotation (and thus reduce or prevent knee pain) can include activating your inner thighs, your outer thighs, the front of your thighs or the backs of your thighs.
It can also include a combination of some or all of these.
Activating Your Inner Or Outer Thigh Muscles
While you can help to activate your inner thigh muscles by placing a yoga block between your thighs and pressing inwards, and likewise activate your outer thigh muscles by pressing outwards against a strap wrapped around your thighs, there is an alternative method for learning both that doesn’t require the use of props.
While standing with feet apart you can press your thighs apart to activate your outer thighs and hips. Relax and repeat to get a feel for these muscles activating so that you can memorize it and thus activate these muscles at will.
Then, press your thighs inwards to activate your inner thigh muscles. Relax and repeat to get a feel for these muscles so that you can activate them at will.
When trying to activate these muscles with the knees bent, prevent your knees from moving for a stronger activation.
For happier pain free knees it can help to practice activating these muscles while the hips are bent outwards (abducted) or inwards (adducted). This can be done with knees bent and with knees straight.
It can also help to practice activating these muscles with the hips bent forwards (flexion). Here again try this both with knees bent and with knees straight.
And it can help to practice activating them with the hip bent backwards. Likewise, the suggestion is to do it both with knee straight and with knee bent.
Muscles that control shin rotation
Muscles that can help control shin rotation while standing include muscles that attach from the shin bones to the tarsals and metatarsals. Other muscles include the toe flexors and toe extensors. These also attach at the shin bones.
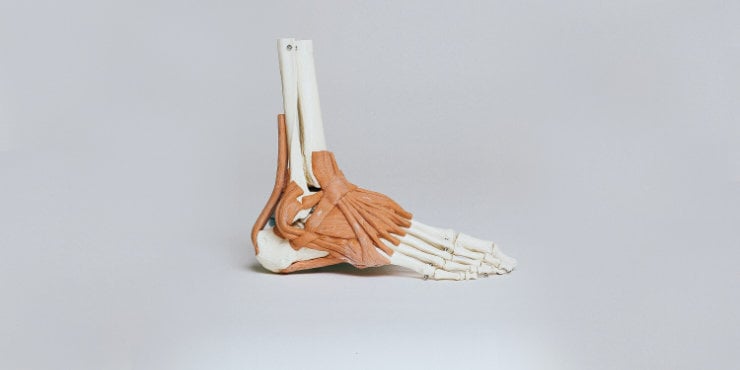
These muscles not only control shin rotation but the amount of lift in the inner arch.
-
When standing, if you externally rotate your shins, your inner arches will lift.
-
If you internally rotate your shins, your inner arches will flatten.
And so when working on knee pain, it can be helpful to stabilize your foot arches, not just with the arches lifted, but also with them flattened, and in any position in-between.
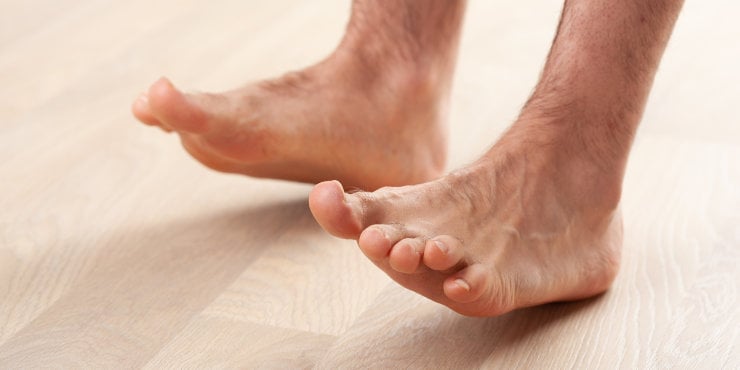
And so that you also activate your toe extensors and flexors, it can help to spread or stiffen your toes or both.
How Do I Know if Yoga Is Safe for My Knee?
For any yoga pose, if it hurts your knee, don’t do it. Or change the way that you do it.
If you want to try a yoga pose that you know hurts your knee, then work into it slowly and carefully making sure that you can brace yourself or back out of the pose easily if you do experience pain.
If you move slowly and smoothly while doing yoga (or other exercises) for knee pain, you can listen for early warnings that you are moving into a painful position. You can then make adjustments to see if that helps. Or simply stop where you are.
While some knee problems may be due to poor neuromuscular programming, others may be tissue problems that need time to heal. In this case, if your intuition tells you that you should leave a pose out, then leave it out.
How to avoid knee pain in yoga
Because it is easier for pain signals to be drowned out in vinyasa flow style classes and hot yoga classes, when doing these types of classes, avoid any poses that you know potentially cause knee pain or damage.
Another option is to come up with modifications ahead of time for poses that cause knee pain.
Yet another option, particularly if you know that you are prone to pushing yourself, is to avoid these classes.
One advantage of developing a personal at-home yoga practice is that you can work towards poses slowly and carefully, particularly if there are poses that you know cause knee pain but you want to do them anyway.
Going at your own pace (assuming it is slow and smooth) gives you time to listen to your knee. You then have the time to make adjustments, including moving out of a pose if it causes knee pain.
One style of hot yoga, Bikram yoga, was developed specifically to deal with knee pain. You can learn this style from books and videos. Also note, that you might choose to do this sequence of poses without the heat (or work towards doing it without the heat.) It may be that it is the sequence, and not the heat, which is most beneficial for dealing with chronic knee pain.
When you practice yoga, you should know that while some yoga poses can be used to stretch muscles that work on the knee and others can be used to strengthen those muscles, how you work on your knee should depend on what is causing the problem.
One way to approach yoga for knee pain
When doing yoga for knee pain, one approach is to learn to feel and control the muscles talked out above. Rather than learning them all at once, focus on one set of muscles. Learn to feel and control them in gradually more challenging poses. Then learn to integrate the control of these muscles with the control of other related muscles.
Using this approach, it’s not so much about the poses that you do, but the muscle control that you practice while doing a variety of poses.
So for example, you could learn to feel and control:
-
Your hip suspension system.
-
From there improve foot control.
From there learn to feel and control the muscles that control:
-
Shin rotation relative to the foot.
-
Shin rotation at the knee
-
Shin rotation relative to the hip bone
If you learn to feel and control your muscles voluntarily, this gives you greater agency when dealing with knee pain. You can also apply it to improving function in general, even when you no longer have knee pain.
Yoga Poses That Help Relieve Knee Pain
Yes, there are. Some effective poses to alleviate knee pain include, but are not limited to:
-
Butterfly pose
-
Pigeon pose
-
Chair pose
-
Triangle pose
-
Bridge pose
-
Warrior poses
-
Warrior I
-
Warrior II
Poses to Approach with Caution
While the idea of yoga for chronic pain in the knee is to learn to feel and control particular muscles while doing yoga poses, a type of pose that you may be wise to leave out is any variation of lotus pose.
Also leave out any pose that causes joint pain in the knee, and that you can’t approach or modify without causing knee pain.
References
Knee pain | HealthEngine Blog.
Knee Pain Treatment, Causes, Remedies, Symptoms.
Yoga For Bad Knees Or Injuries (Try These Modifications).
Practice These 10 Yoga Poses to Relieve Knee Pain | YogiApproved.com.
Avoid Knee Pain and Injury with Yoga.
How to Do Chair Pose in Yoga – EverydayYoga.com.
Walking Backwards Benefits So Much More Than Your Knees - @BODYAGEBUSTER
Reverse Walking on the Treadmill for Physical Therapy
Disclaimer
The contents of this article are provided for informational purposes only and are not intended to substitute for professional medical advice, diagnosis, or treatment. It is always recommended to consult with a qualified healthcare provider before making any health-related changes or if you have any questions or concerns about your health. Anahana is not liable for any errors, omissions, or consequences that may occur from using the information provided.

By: Anahana
The Anahana team of researchers, writers, topic experts, and computer scientists come together worldwide to create educational and practical wellbeing articles, courses, and technology. Experienced professionals in mental and physical health, meditation, yoga, pilates, and many other fields collaborate to make complex topics easy to understand.
